Showing posts with label Bag. Show all posts

Friday, 27 July 2012

Made: Items made in our classes and shop this month

We have been really busy recently, thinking up and trying out new patterns as well as guding our students through making some of our most popular items. We have had a really successful first holiday sewing club and Tracey is trying to plan a new patchwork / quilting class which we are really excited about.

All of these items were made in the shop.


The zip up make up bag was made in our holiday sewing club, isn't it great? I love the bright apron too.


The Penny pleat bag (shown here in the dolls fabric) is one of our new patterns that will be available soon.

Hope this inspires you to make something soon, or join us for a class. Please see the Sewing Workshops section of our website for details.

Happy sewing,

Kelly

Wednesday, 11 July 2012

Inspiration: Teacher's Gifts

Suddenly the end of term is upon us and it is the perfect time to make a little something to say thank you to your or your children's teachers.

We have some brilliant ideas for simple gifts to make. I have added a link to all of the tutorials that we have on our blog.

Envelope cushion - brilliant quick make, just one piece of fabric and four straight lines of stitching.

Two fat quarter cushion - very similar to the above but made with two fat quarters.

Tote bag - something for your teacher to take all her other gifts home in.

Bunting - really easy to make and everyone loves a bit of bunting to cheer up a room.


All of these items were made in our Open Sewing Session from fabric bought from our shop. We have lots of new fabrics in the Owl and Sewing Cat online store that would be perfect for these.

Friday, 22 June 2012

Coming soon: Holiday Sewing Club

We now have details of classes running throughout the summer on our website. One of the ever popular sessions we will be running is our Sewing Club for 10-16 year olds.

If you are (or know someone who is) a young person interested in learning to use a sewing machine come along to one of our sessions and you can learn to make something special. We have a new project each session and Tracey takes you through the whole process from start to finish.

The dates and projects are listed below. Sessions cost £20 and include all the fabrics you need.


10th July - Pencil case
24th July - Apron
7th August - Bag with decoration
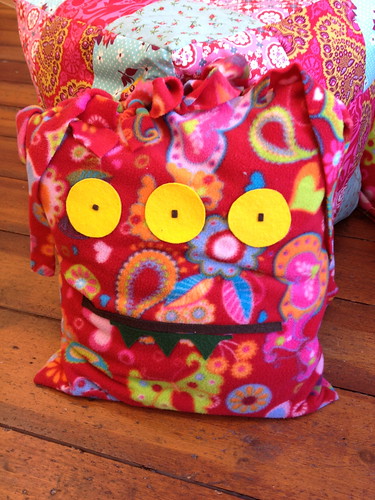
21st August - Monster cushion made from felt - design your own

Please contact us by telephone or pop into the shop if you are interested in booking one of the classes.

Happy sewing,

Kelly

Friday, 13 April 2012

Tutorial: Simple Tote Bag


Requirements:
2 pieces of fabric 15” (38cm) x 19” (48cm) for main bag
2 pieces of fabric 3.5” (9cm) x 27” (68cm) for straps
Sewing machine
Tape measure
Scissors
Needle and thread
Pins


1. Take the two rectangle pieces of fabric and place them right sides together and stitch around the three sides taking a ¾” (1.5cm) seam allowance and leaving the top edges un-sewn. Zig zag the outside edges together or pinking shear, to neaten them and then turn rights side out and press.


2. Fold over and press 1 inch (2.5cm) from the top edge and then another 1 inch (2.5cm) to make a double hem along the top edges. Then pin in place.


3. Next step is to make the handles, by taking the long strips and fold them in half lengthways with the right sides together and press. Then stitch the long edges together with a 3/8 inch (1cm) seam allowance. Turn the straps the right side out by attaching a safety pin to one end on the single fabric and push it through until it comes out the other end and is then turned the right sides out. Now press the straps flat with the seam on the centre of the reverse and topstitch along both long sides of the straps for a neat finish and to stop them twisting.


4. Using pins mark the handle positions on the bag’s top hem, placing them 3” (7.5cm) in from the side seams. Then take the straps and pin them in place tucking them under the top hem of the bag. Once pinned in place double check that the straps are not twisted and machine stitch the hem around the top and bottom edges a foot width away from the edge, therefore reinforcing the handles at the same time.


5. For some more fun add ric rak, decorative trim, labels or buttons onto the anchor points of the bag.


We would love to see any bags that you make. Email us a picture or add to our Facebook page.

Related Posts Plugin for WordPress, Blogger...